Launching a website has never been easier thanks to Hostinger's user-friendly hosting platform. Whether you're creating a business website, portfolio, blog, or e-commerce store, Hostinger provides the tools needed to get your website online quickly.
In this guide, you'll learn how to host a website on Hostinger step by step, from purchasing a hosting plan to publishing your website on the internet.
Why Choose Hostinger for Website Hosting?
Hostinger is a popular web hosting provider known for its affordable plans, fast performance, and beginner-friendly dashboard. Some key benefits include:
- Affordable hosting plans
- Free SSL certificate
- Free domain with selected plans
- Easy WordPress installation
- Fast loading speeds
- 24/7 customer support
- User-friendly hPanel
These features make Hostinger a suitable choice for individuals, startups, and small businesses.
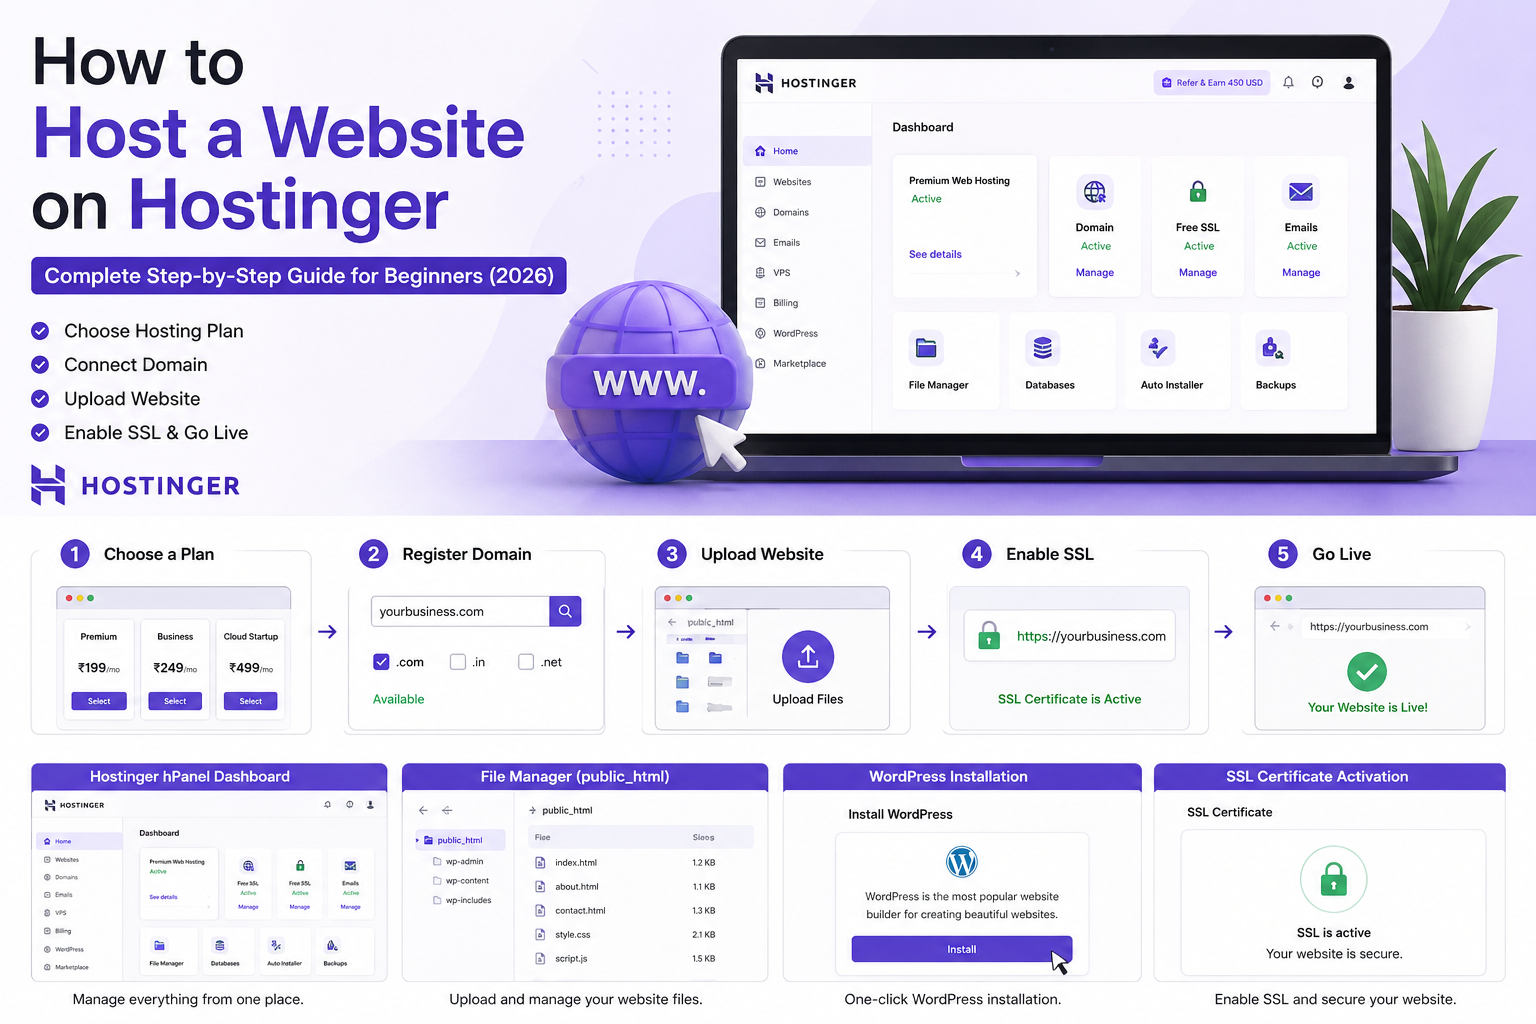
Step 1: Choose the Right Hostinger Hosting Plan
Before hosting your website, select a hosting plan based on your needs.
Shared Hosting
Ideal for:
- Personal websites
- Blogs
- Small business websites
WordPress Hosting
Ideal for:
- WordPress websites
- Business websites
- Content-focused websites
VPS Hosting
Ideal for:
- High-traffic websites
- Custom applications
- Growing businesses
For most beginners, a shared hosting or WordPress hosting plan is sufficient.
Step 2: Register a Domain Name
A domain name is your website address, such as:
- yourbusiness.com
- yourbrand.in
Choose a domain name that:
- Is easy to remember
- Matches your business name
- Uses relevant keywords when appropriate
- Is short and professional
After purchasing your hosting plan, register your preferred domain name.
Step 3: Access Your Hostinger Account
After completing your purchase:
- Log in to your Hostinger account.
- Open the Hosting Dashboard.
- Navigate to the hPanel control panel.
The hPanel allows you to manage domains, files, databases, emails, and website installations from one location.
Step 4: Install WordPress on Hostinger
WordPress powers millions of websites worldwide and is one of the easiest ways to build a professional website.
To install WordPress:
- Open hPanel.
- Select Websites.
- Click Add Website.
- Choose WordPress.
- Enter your website details.
- Create an administrator username and password.
- Click Install.
Within a few minutes, WordPress will be ready to use.
Step 5: Connect Your Domain
If you purchased your domain through Hostinger, it will usually connect automatically.
If your domain is registered elsewhere:
- Open your domain registrar account.
- Update the nameservers.
- Enter Hostinger's nameserver information.
- Save the changes.
DNS updates may take up to 24 hours to propagate worldwide.
Step 6: Upload Your Website Files
If you already have a custom website:
- Open File Manager in Hostinger.
- Navigate to the public_html directory.
- Upload your website files.
- Ensure your homepage is named index.html or index.php.
You can also upload files using an FTP client for larger websites.
Step 7: Enable SSL Certificate
SSL secures your website and improves trust with visitors.
Benefits include:
- Secure HTTPS connection
- Better search engine rankings
- Increased customer trust
To activate SSL:
- Open hPanel.
- Navigate to SSL settings.
- Enable the free SSL certificate.
- Wait for activation.
Your website will then use HTTPS.
Step 8: Create Professional Business Email Addresses
A business email enhances professionalism.
Examples:
Hostinger allows you to create and manage custom email accounts directly from the control panel.
Step 9: Optimize Your Website for SEO
To improve visibility on search engines:
- Use SEO-friendly URLs
- Write unique page titles
- Optimize images
- Improve loading speed
- Create quality content
- Add internal links
- Use relevant keywords naturally
SEO helps potential customers find your website through search engines.
Common Mistakes to Avoid
Many beginners make these hosting mistakes:
- Choosing the wrong hosting plan
- Ignoring website backups
- Using weak passwords
- Forgetting SSL activation
- Uploading unoptimized images
- Not updating WordPress and plugins
Avoiding these issues can improve security and performance.
Why Businesses Need Professional Website Development
While website builders and WordPress make website creation easier, many businesses require custom features, better design, advanced SEO, and ongoing support.
Professional website development can help improve user experience, search rankings, lead generation, and overall business growth.
Final Thoughts
Hosting a website on Hostinger is a straightforward process that even beginners can complete without technical expertise. By choosing the right hosting plan, registering a domain, installing WordPress, enabling SSL, and following SEO best practices, you can successfully launch a fast and secure website.
Whether you're building a personal blog, business website, or online store, Hostinger provides an affordable and reliable platform to get started online.